
Microsofts Privileged Identity Management tooling is defiantly worth the investment, especially if you are configuring your landing zone in Azure. It does require an EntraID P2 license for all your admins (and actually, any business users who need to 'do stuff' within your environment).
So what is PIM?
Microsofts official blurb states: Privileged Identity Management (PIM) is a service in Microsoft Entra ID that enables you to manage, control, and monitor access to important resources in your organisation.
Which basically means you are able to apply a policy to privileged access roles, and provide an extra step of authentication in order to get the required permissions for a limited set of time. You usually see it being used to lock down built-in roles such as Global Admininstrator within Microsoft365.
Outside of these built-in roles, you can also use it to manage membership to EntraID groups, with opens up a whole world of flexibility when it comes to locking down resources.
In this post, I thought I'd show you how I use groups with privilaged identity management to control access to resources within Azure, and at the end, I cover a few cheeky tips on how you can use the rest of the Entra suite to build upon it and add some governance steps.
So the scenario...
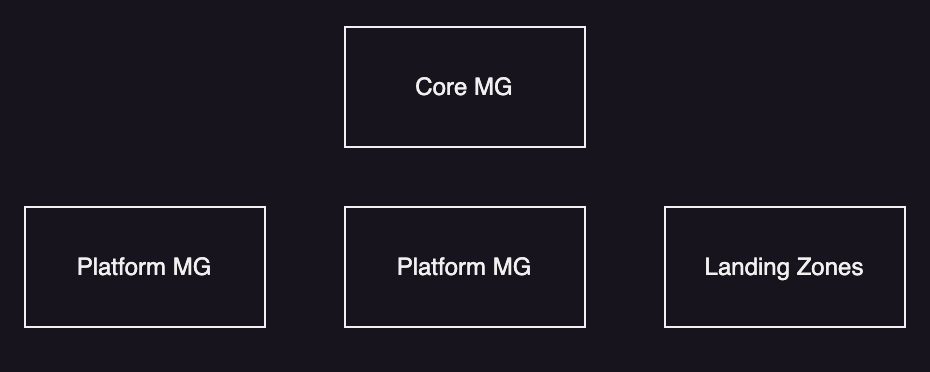
For this demo (of sorts), I want to assign the Virtual Machine Contributor role to my core management group. This will be used by the platform engineering team when they need to perform virtual machine tasks across the whole environment. This is how my management groups look for this demo:
So, to make this all happen, the high level tasks to complete are:
- Create an EntraID group that will be given the relevant permissions.
- The group will be given VM Contributor at the Core Management Group.
- We will enable the EntraID group within PIM and assign some basic settings.
- We will give Platform Engineers the ability to request the permissions.
Creating the group
The first step is to create the actual group in EntraID. To do this, head over to https://entra.microsoft.com and make your way to groups. I will be creating a 'Cloud Only' group, rather than a synchronised group, as it gives some flexibility should I want to give external identities or service principles similar access.
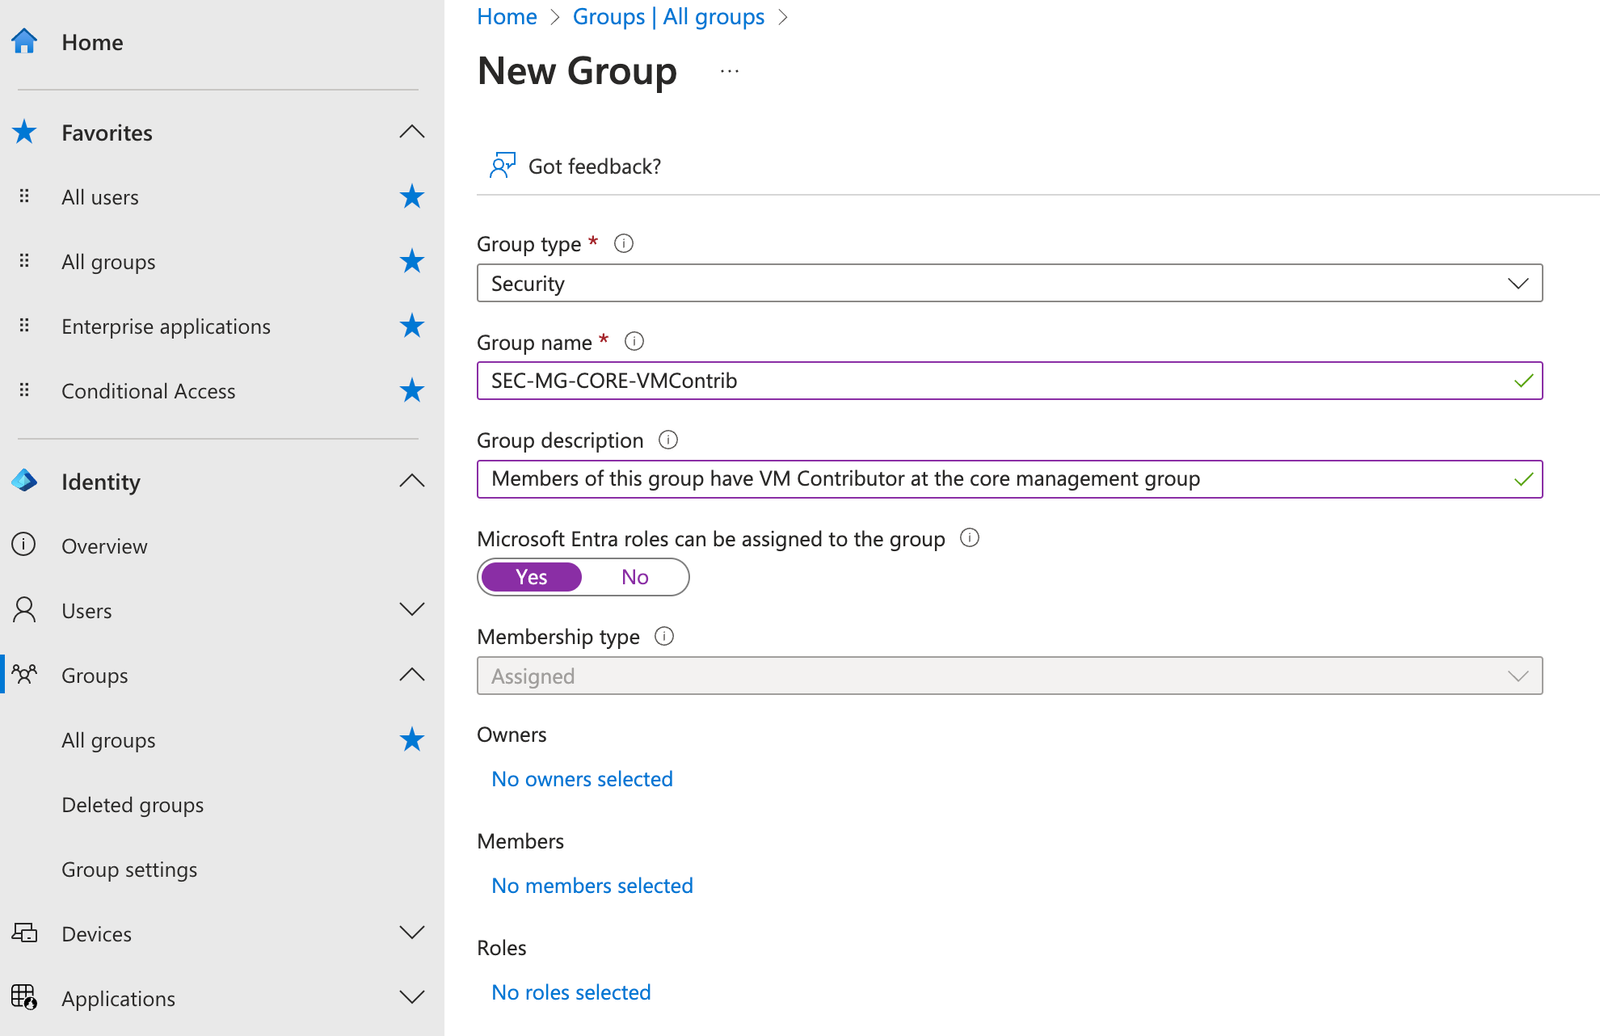
The key point here is to make sure you check 'Microsoft Entra roles can be assigned to this group'. This will set the attribute 'isAssignableToRole' on the object. This is key point, as it sets some protections on the group, where only Global Admins and Privileged Authentication Administrators can adjust membership. More information can be seen here.
Once the group is created, we will need to enable the Group for use with PIM. To do this, find the group within EntraID/Groups, and click on 'Privileged Identity Management' under activity on the left hand panel. Now click on 'Enable PIM for this group'.

Once done, we can now start configuring the rules for PIM and this group.
Setting up PIM
The easiest way to do this is within the group (if managing loads of groups at once, you can do from the PIM blade within the Azure portal). Now that PIM is enabled, you will see the following screen:

Some points worth calling out here:
- The tasks you can do at across the top bar. Add assignments etc.
- The next row is all about viewing who can do what. Edible assignments are for accounts that CAN use PIM to elevate their access to this role.
- Active assignments are the accounts that currently have the permissions applied.
So, the first step is to configure the settings (which will make up the policy). To do this, click on 'Settings'. The next screen will present you with two options. 'Owner' and 'Member'. This gives you the ability to configure a different policy to be added as a 'Owner' or a 'Member' of the group. We will configure both in this demo.

Once you click on the setting, you will see a whole bunch of settings. There are a lot of settings here, so I'll split them up a little. The first two sections are around the user experience and the high level settings behaves (think user experience here).
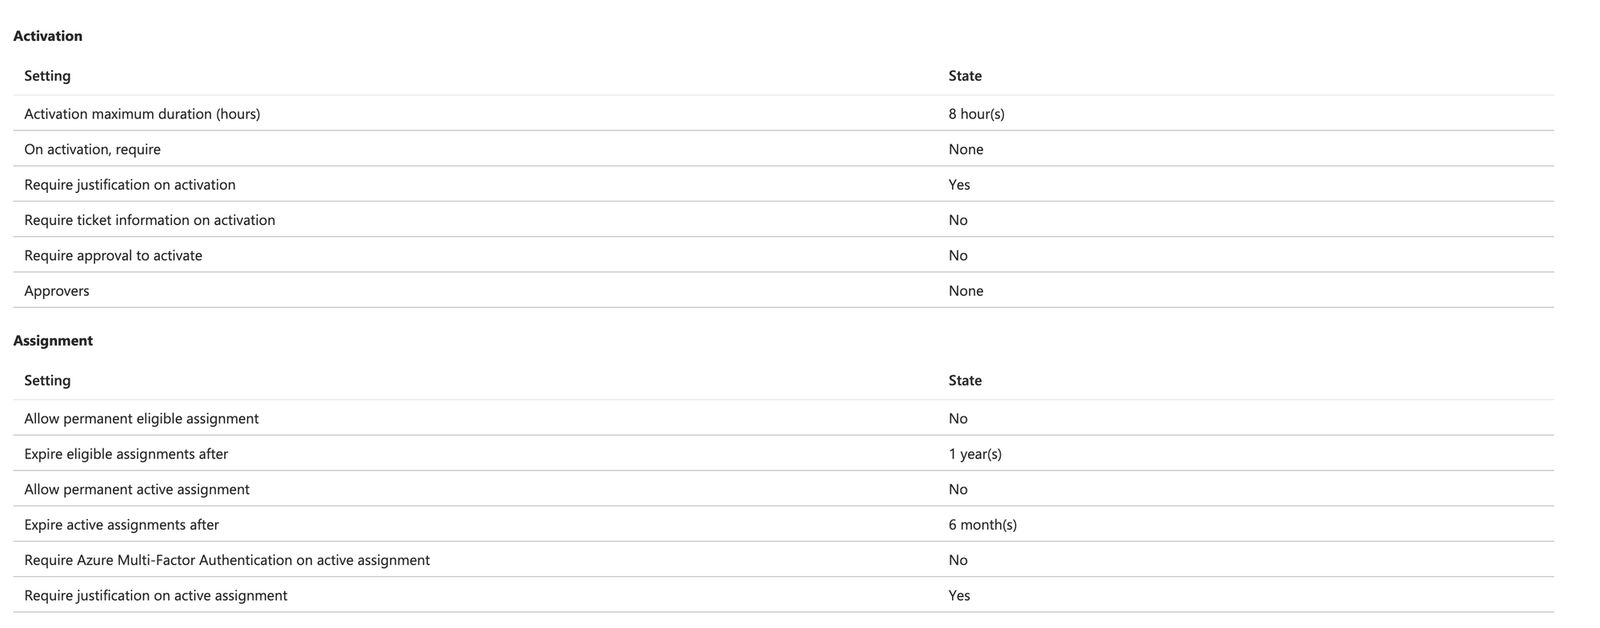
The first section 'Activation', are the settings to configure the user experience and what needs to happen at the time of a user requesting elevation of their permissions. Key points worth calling out:
- Maximum duration is how long a user can request the permissions for. Once this time runs out, the platform will remove the user from the group. Depending your requirements, and the level of privilege an account has, I recommend changing this. Personally, I drop as low as 1 hour for things like Owner or Global Admins. Bear in mind, this could be a pain when the tasks at hand (the reason why a user has requested the access), may take longer than the hour. So make sure you understand the use case before setting it. Or get ready for annoyed admins 😄
- The next settings 'On activation, require' is where you can set the authentication requirements when activating. There are a few of options here:
- None - This will simply allow the role to be activated.
- Require Azure MFA - This will request an MFA prompt when requesting the access. Bear in mind, if the user already has a token and has satisfied this claim, they won't be prompted.
- Use authentication strength. This is a fairly recent feature, but it will also you to use your authentication strengths when logging in. For example, you a force the use of Phishing resistant options such as FIDO keys for privilaged roles. This is a big one for me, and I would highly recommend it.
- The 'require justification and ticket information' will let you configure some prompts for the user to complete when requesting access. For example, you can request for a justification or ticket number, which is stored within the audit logs. This is great for investigations or downstream automation if required. - I've used the ticket field before now to update a ticket within Service Now that the PIM request was one.
- The final setting you can apply in this policy is where or not approval is required. Here you can add a group or user account who will be notified when I user requests the access. This is a useful feature when working with third parties who use tools such as lighthouse or external accounts.
So that's activation covered! Phew.
Now, what about the next section? Assignment is all about modifying the policy for assigning and adding users to the roles... so making users Eligible. This is where you set the policy on how long users can be assigned to the groups, and whether certain authentication steps and justifications are also required. Here is a look at what it looks like when editing:
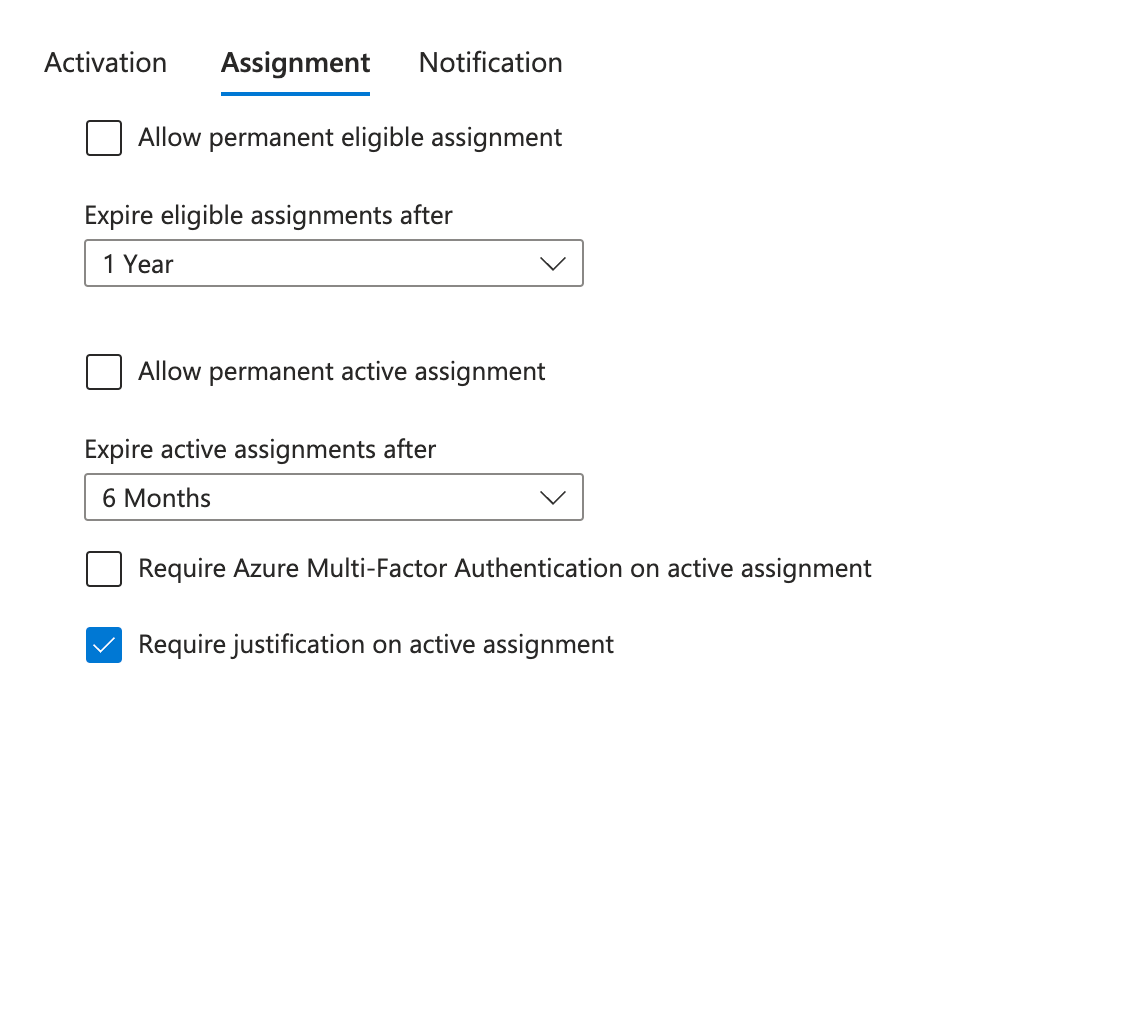
The key points to call out are:
- 'Allow permanent eligible assignment' - I very rarely check this box, leave it off! I prefer to expire eligible assignments after a set period. This ranges within your organisation. However, once this time expires, users will need adding. Always good to cover the dreaded JML process not working with platform governance - More on what other options we have later in this post.
- Similar to above, I never check 'Allow permanent assignment', and also expire similarly.
- The 'Require Azure Multi-Factor Authentication on active assignment' is similar to point 2b above, but sadly, no Authentication strengths just yet.
- Finally, 'Require justification on active assignment' will prompt the user for a reason as to why they need to assign a user. Again, this could be used for logging and automation should it be required.
The final sections are all around 'Notification settings'
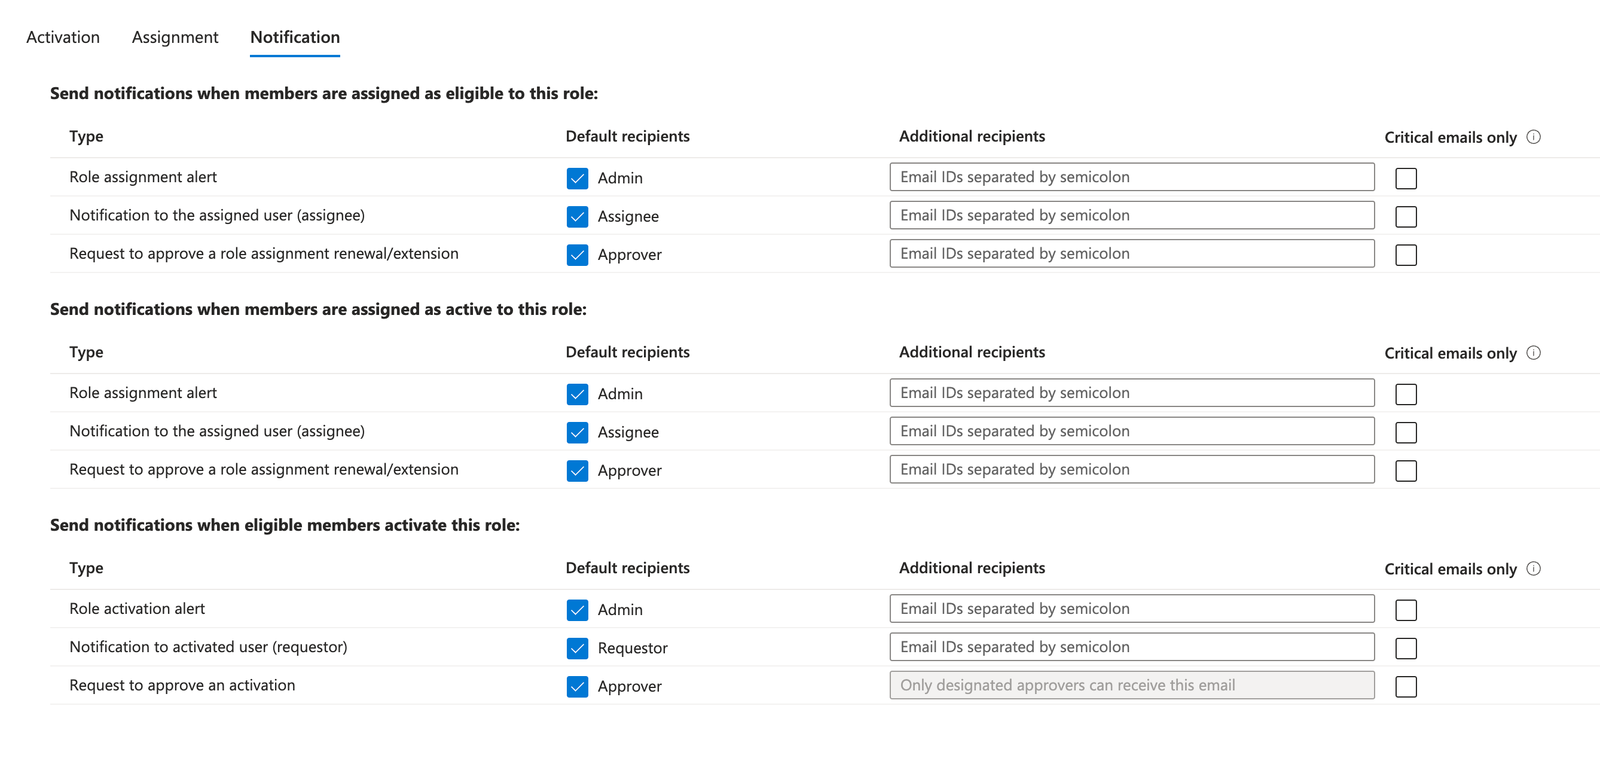
I'll keep these brief, but you can set email notifications on each of the tasks. These are mostly email based, and you can add the users emails on the right hand side.
There, this is now all configured and ready to go! It's now time to add the people who can actually use these settings!
Adding users to the PIM Role
If you are still with me on this post (turning out to be a long one!), then it's time to add to the users who are going to be Eligible. This will basically follow the assignment policy when we do this, so you can see how your settings act!
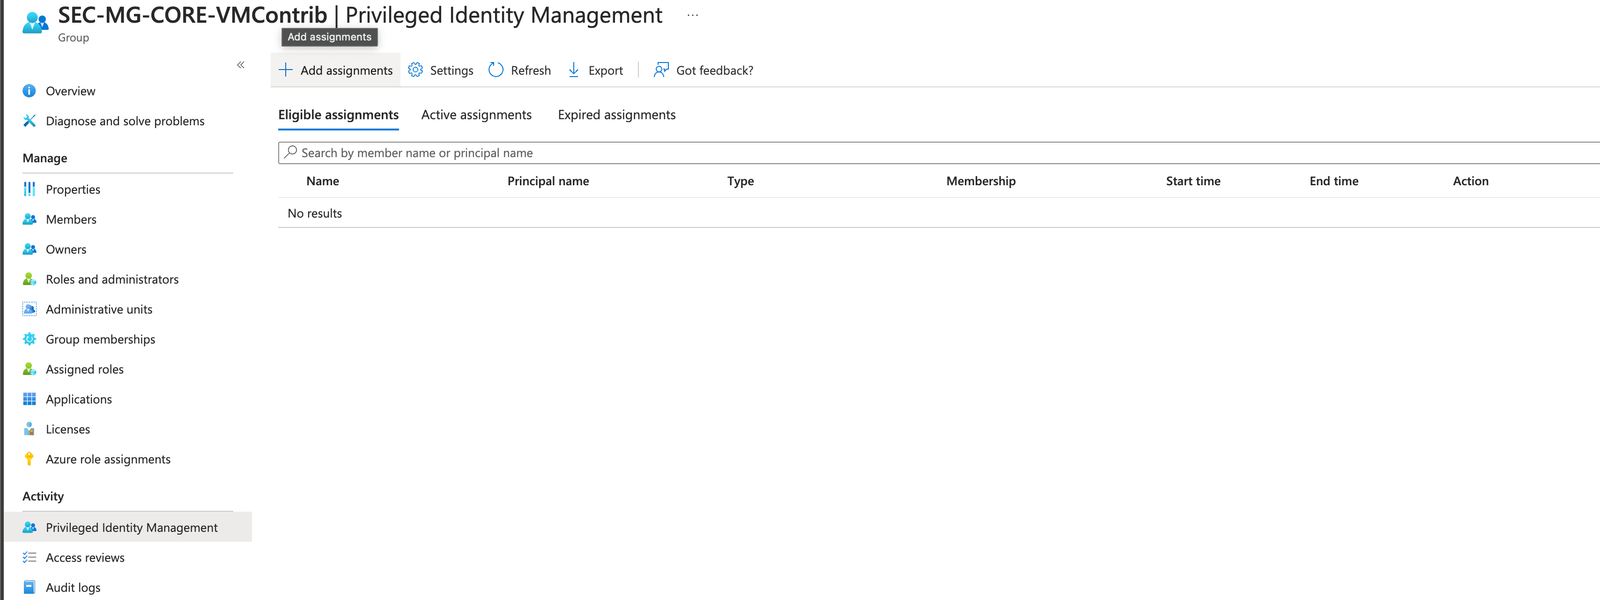
- First step, is to go back to the group, choose 'Privileged Identity Management' from the menu on the left, and choose 'Add assignment':
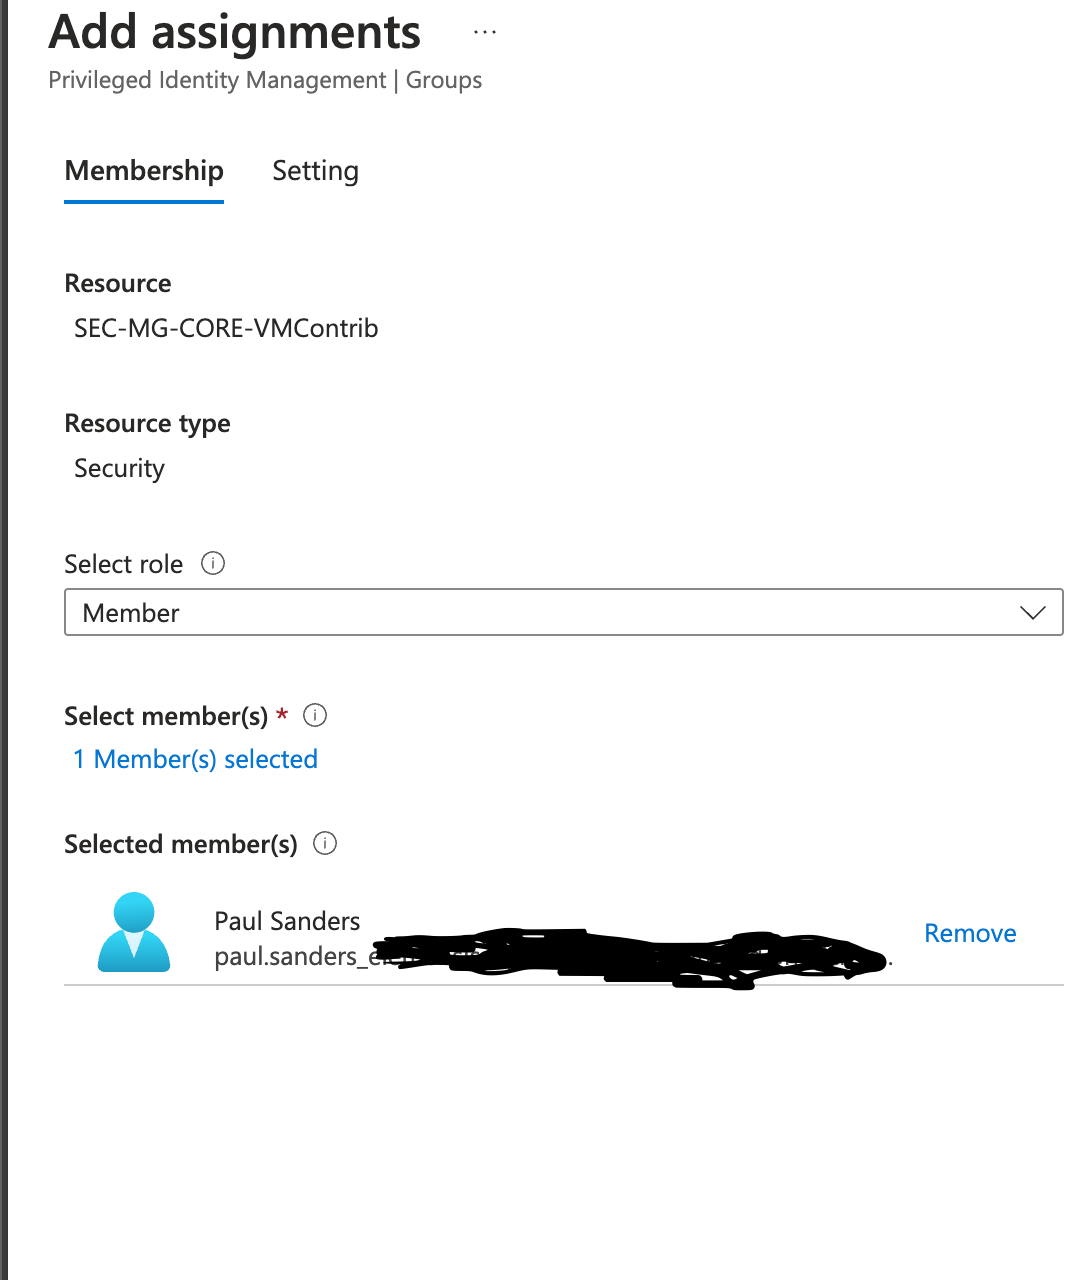
- Next step is to choose the users who need access, as well as the type of membership they can request. We will choose 'Member' in this instance:
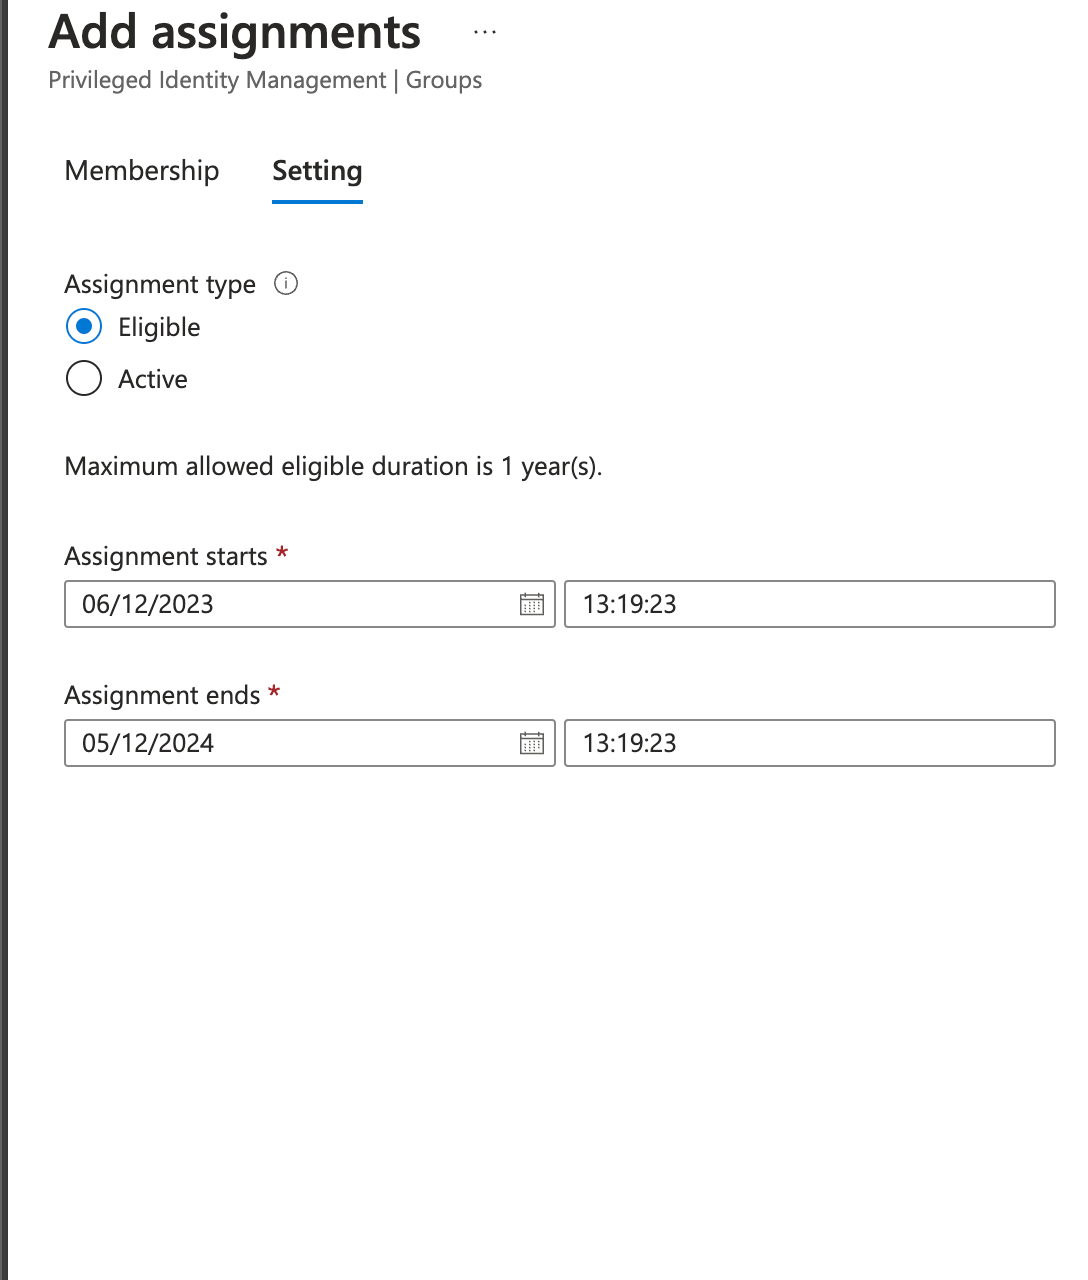
- Once added, Click 'Next', and you can configure the relevant settings. In our case, we will be keeping the user 'Eligible' and keeping it at one year (less if configured that way in the previous steps.
- There you have it, the account 'Paul Sanders', is now able to request access, using PIM when to the SEC-MG-Core-VMContrib group.
Assigning the permissions
The group will now need to be assigned to the relevant location within the landing zone. In our case, this will be applied at the Core Management Group. So to do this, simply make your way over to 'Management Groups', and find the relevant tier, and choose 'Access Control (IAM), and assign the VM Contributor role:
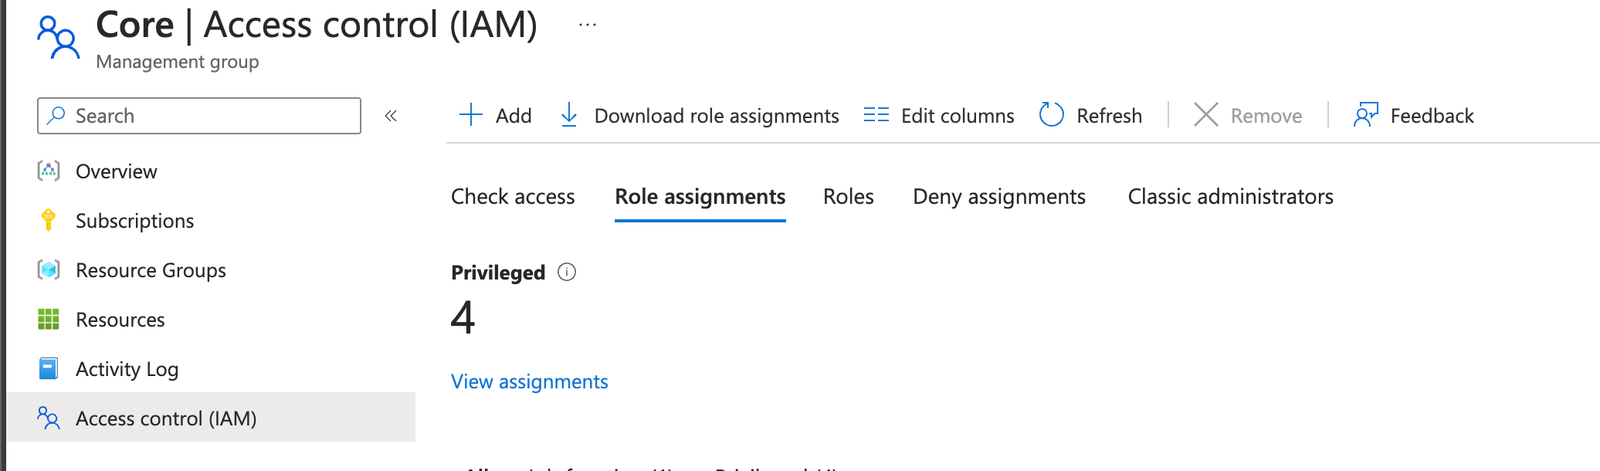
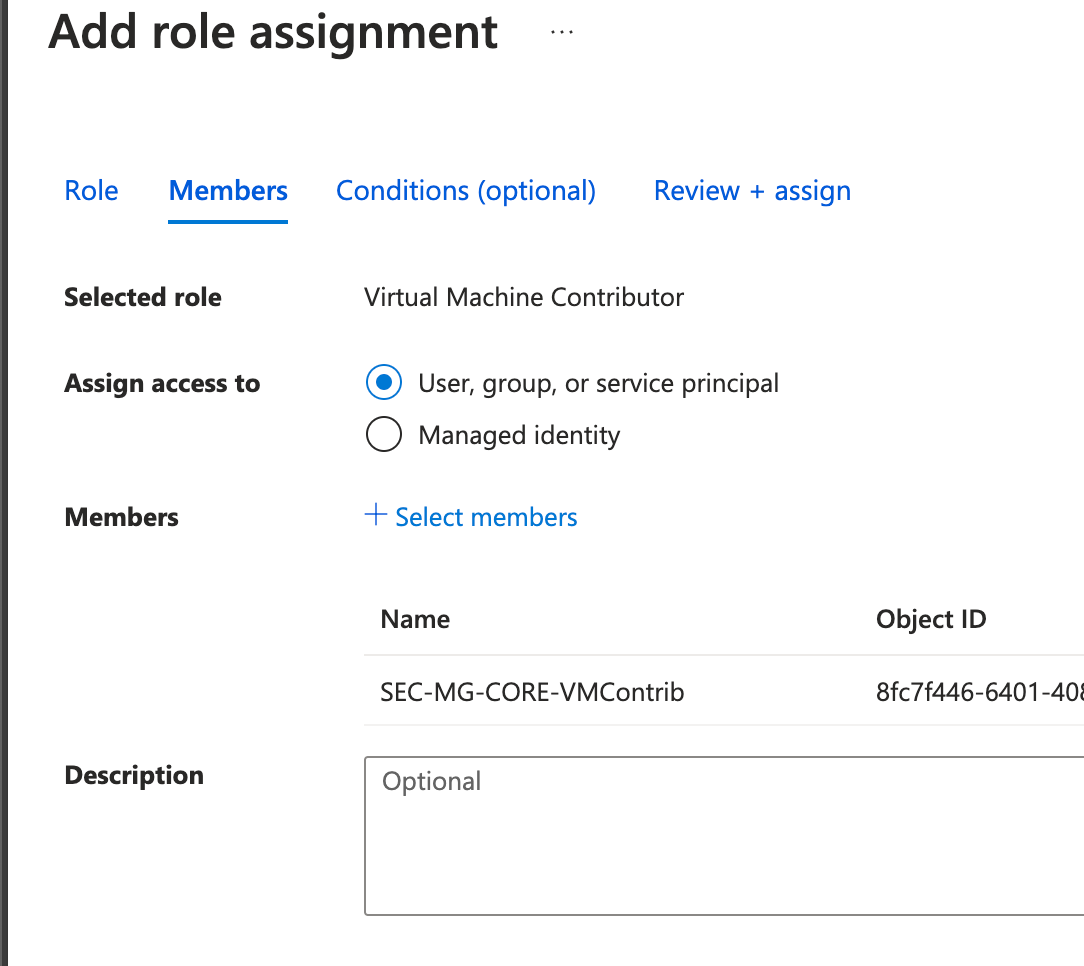
Save everything and you are ready to go!.
User experience
So, what does this look like for your users? If they wish to get the relevant access, they will need to use the Privileged Identity Management Blade within the Azure portal. Once there, they can choose 'My Access/Groups' to see the access they have:
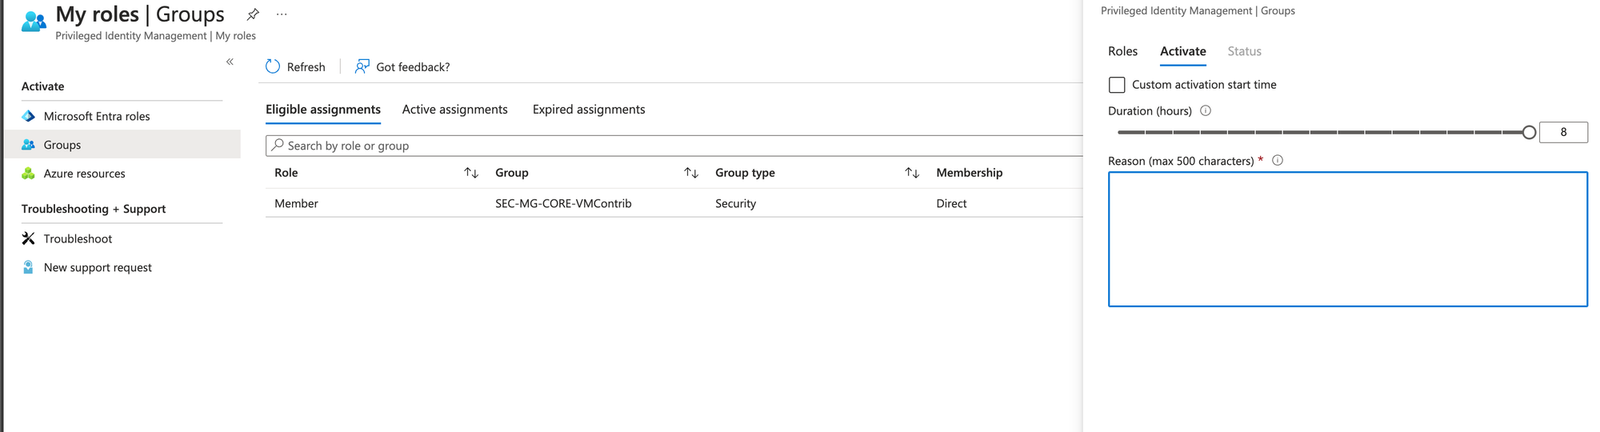
And there we have it
So, this has been probably one of my longest posts since my old technical blogs, but hopefully it has given you an idea on how you can build out this capability for giving access to your engineering teams across your landing zone, and ensuring they use PIM to elevate their access.
I'll write another blog in the not so distant, but this can be built upon using Identity Governance within the Entra suite. This would allow us to build in automation workflows that would regularly validate with accountable owners where the users should still be eligible for PIM, and if not remove. You can also build in self service workflows and map it into your JML process to keep things in check.
If you have any questions, please let me know below.